Getting Started With Gesso
For museums and cultural organizations: You're an organization looking for an easy way to boost audience engagement via audio.
We’ll take you through the entire process from registering to publishing. If you're looking for a specific topic, feel free to jump ahead by clicking on the titles below.
Creating your first exhibition
Adding and editing exhibition items
Creating an account
If your organization is interested in registering as a museum creator, request access by sending our team an email.

Once logged in, you will be prompted to add additional information to your profile such as the organization’s name, preferred URL, short description, address, and profile images. Dimensions for photos should follow a 1.5:1 ratio, for example 1500 x 1000. Image files should be saved as JPG. This information will be visible and associated with any content your organization publishes.
In the exhibitions section of your dashboard, you can edit the organization’s name and images. There is also a section called “additional” where you can edit the description and address as well as add the organization’s Instagram handle and website.
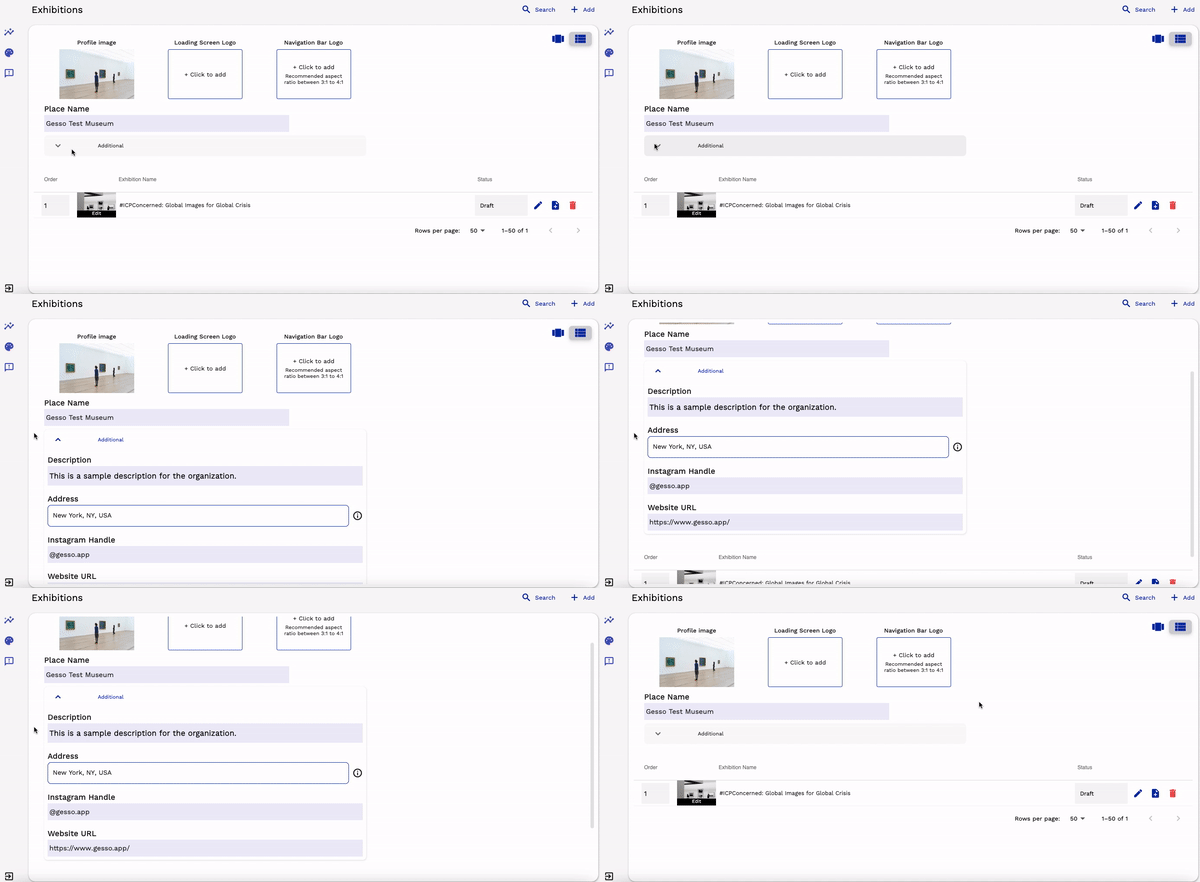
Please note that Gesso often uses language such as “museum” and “exhibition” but we welcome a wide range of organizations to publish audio guides via Gesso. Large and small museums, galleries, cultural centers, historical locations, universities, artist homes, conservancies, and other organizations interested in sharing official audio guides with their audience may use our platform.
Creating your first exhibition
If you are not a traditional museum, think of exhibitions as a themed collection of audio stories narrated by experts from your organization.
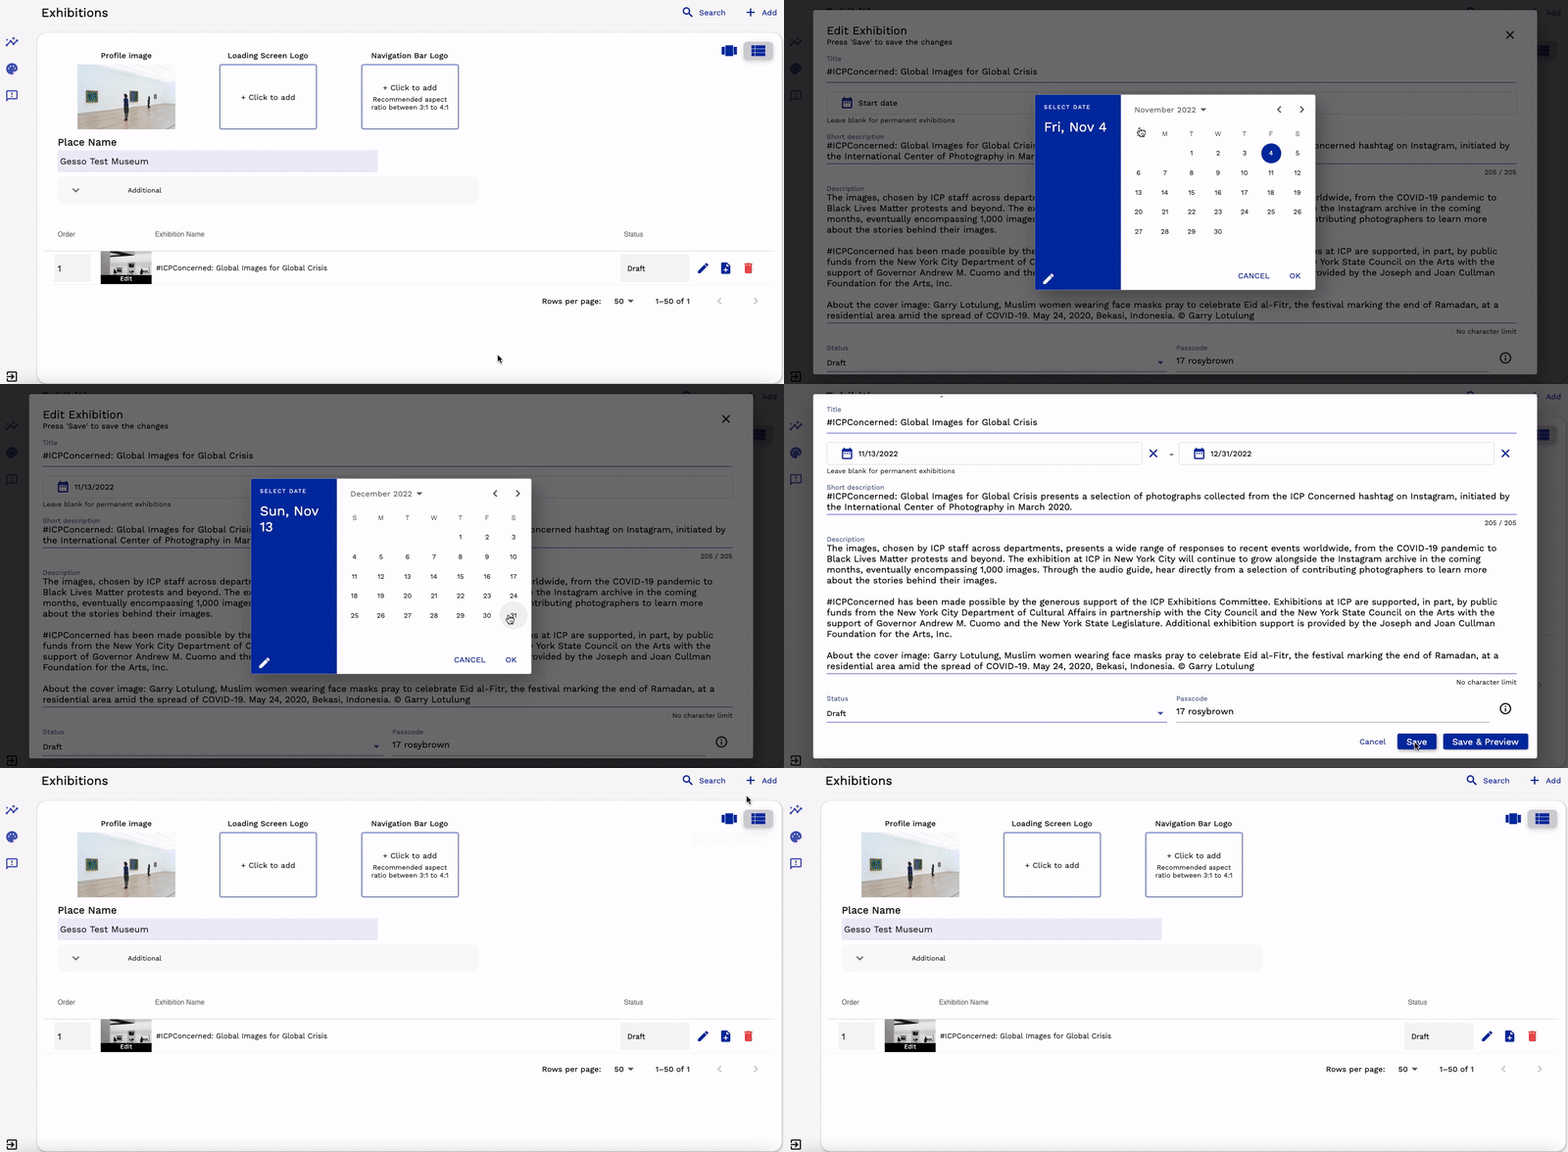
When creating an exhibition, you will first need to give it a title.
If your exhibition will only be available to the public for a certain amount of time, fill in the start and end date. If your exhibition is permanent or if you’re creating a general audio guide, please leave this blank.
The short description should only be one sentence as this will show up in the main exhibition list view. Below this is where you can enter a longer description of what this exhibition is about. This long description will be displayed under the cover image and title in the Gesso app and will show up before the individual audio stories within the exhibition.
To create multiple exhibitions, click on the “Add” button on the upper right corner of your dashboard.
Adding and editing exhibition items
Once you’ve created an exhibition, add individual items to it by giving each a title, description, image, and audio file. You can specify in the “Type” section whether the item is image only, video, or audio. Dimensions for photos should follow a 1.5:1 ratio. Image files should be saved as JPG. Other files, including JPEG, won’t be uploaded properly. Audio files should be saved as MP3, and there is no limit on the image or audio file sizes.
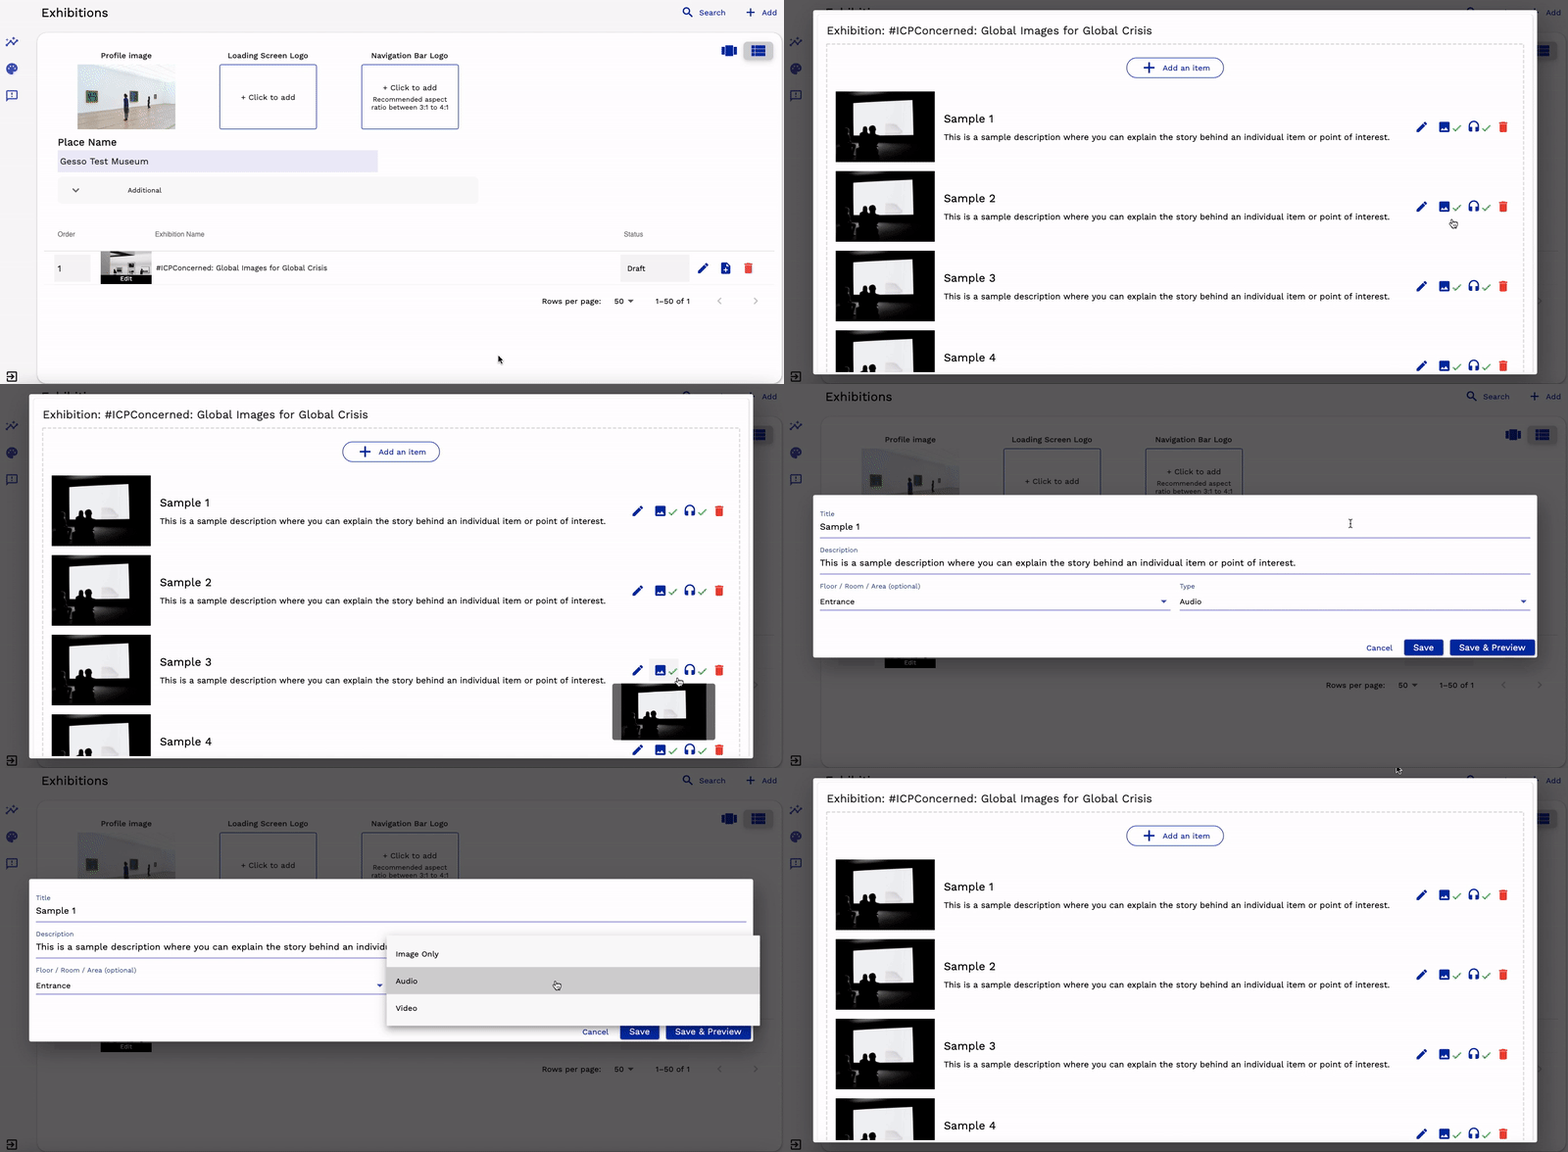
In the item details, you will also notice a “Floor / Room / Area” option. This feature is optional and should be used if your organization wants to group items together when there are a lot of items in the official guide.
If applicable to your situation, click on this section and then click “Manage Floors” to add more details. When you add a floor, you can give it any name you want. For example, a museum might create floors titled “2nd” and “3rd” to help visitors navigate audio stories based on their location within the museum.
Once you fill in item details, press save. You can add more items and edit item details anytime in your exhibition dashboard.

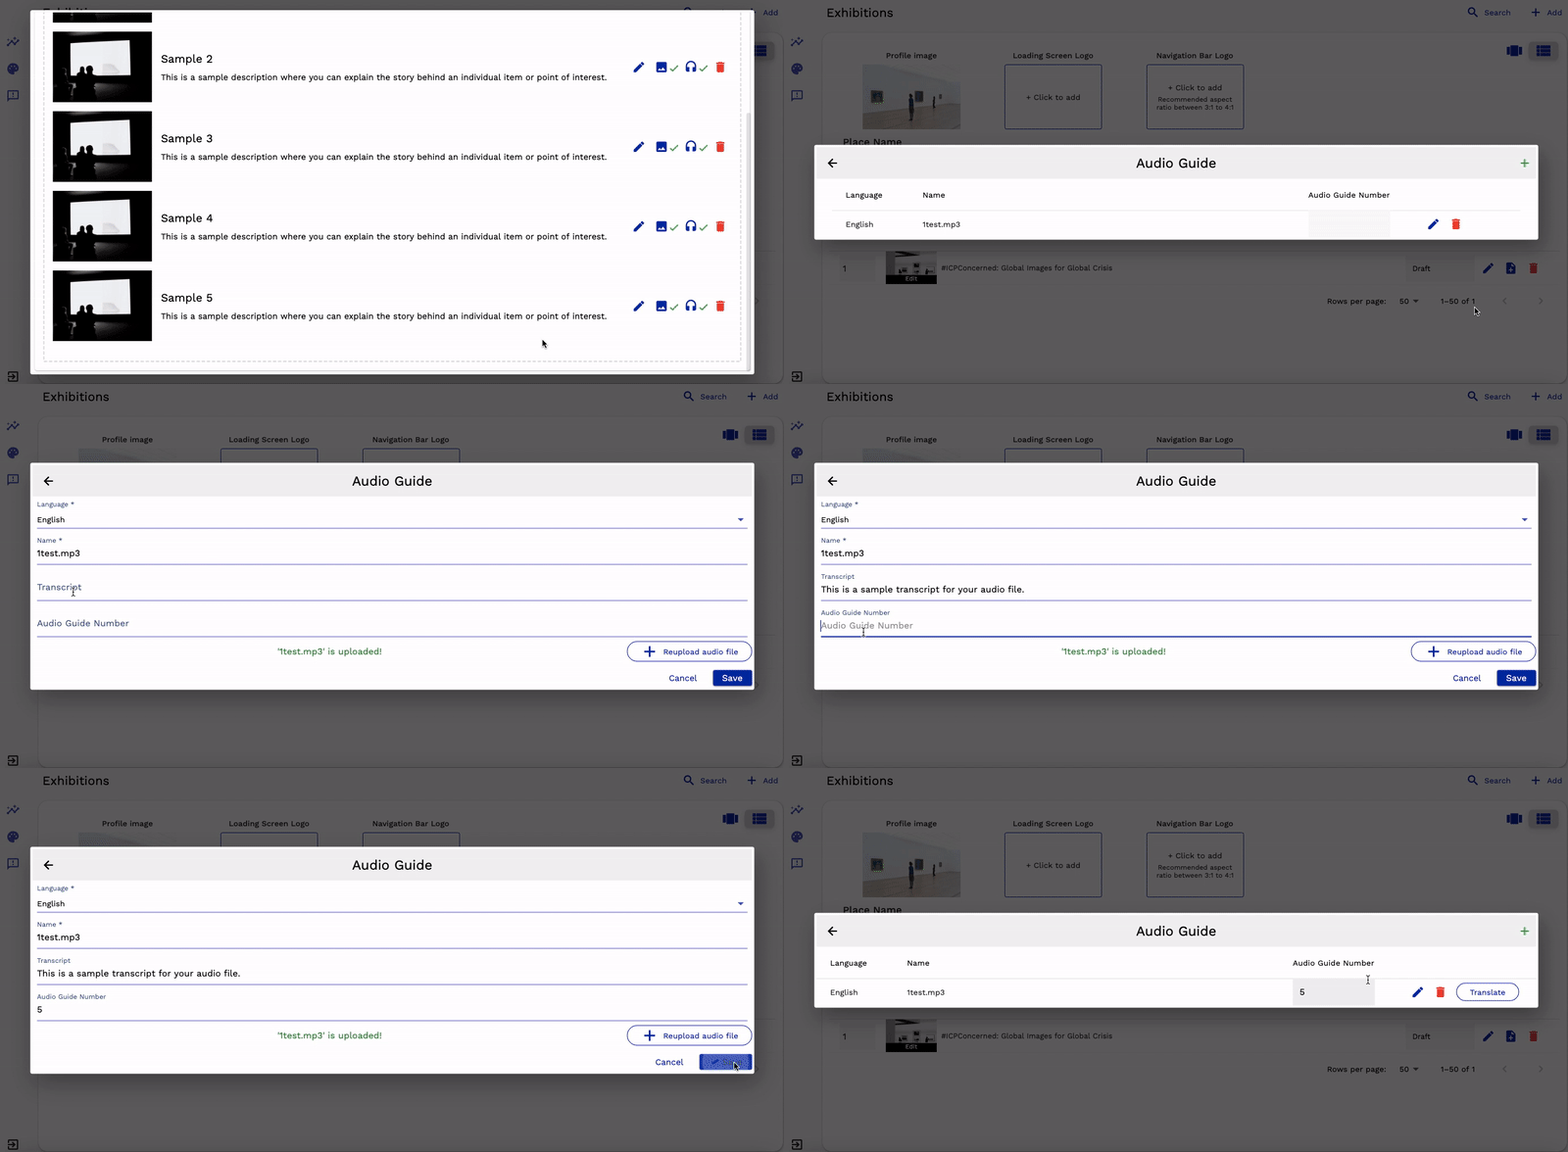
Next to each item, you will see a pencil icon to make edits, an image icon to edit and add images, a headphone icon to edit and add the item’s audio guide, and a trash can icon to delete the item.
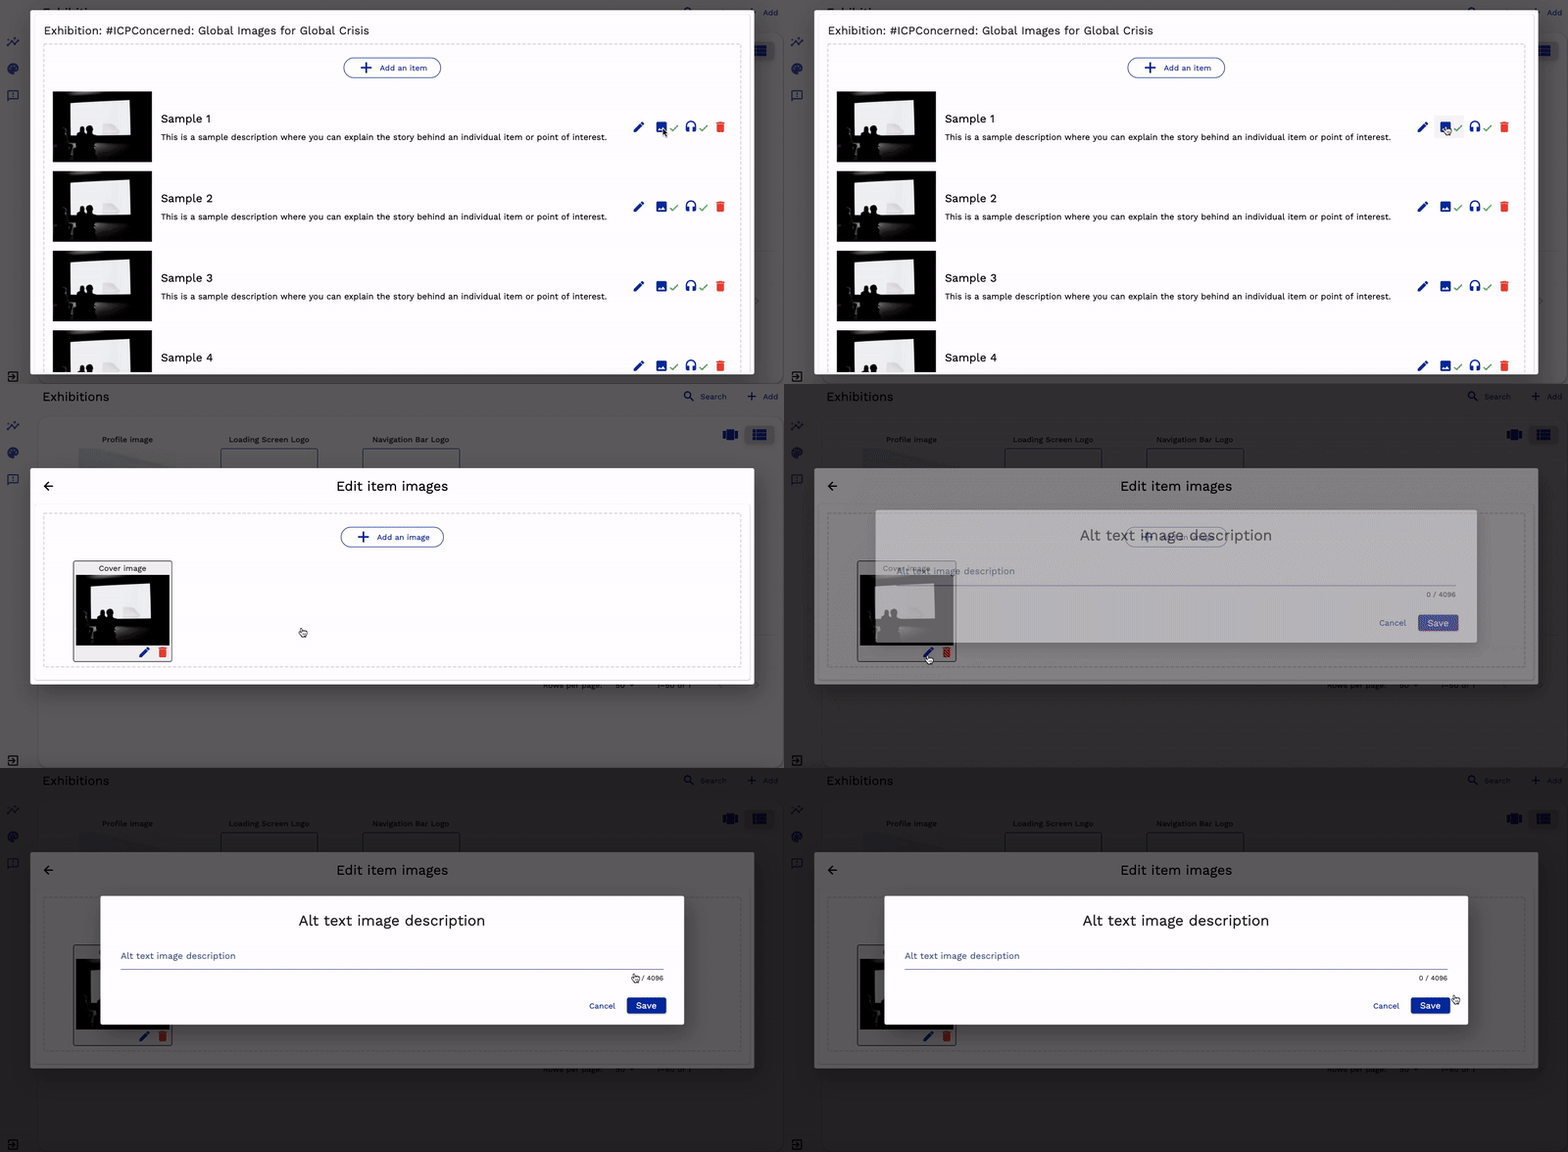
If you'd like to add alt text to your images, click the image icon and then click the pencil icon on the image that you wish to update with alt text. You will see a pop-up box called “Alt text image description.” Enter your alt text and press save.
Using the keypad
To add more details to the audio guide, click on the headphone icon and then click on the pencil icon. You can change the audio guide’s language, edit the name of the audio file, add a transcript, and add an audio guide number.
The audio guide number associated with each individual item is the number visitors can enter into the keypad to quickly access specific stories from the official guide.
The keypad feature is available with your official guide via both the Gesso mobile app and the web version.
Translation features
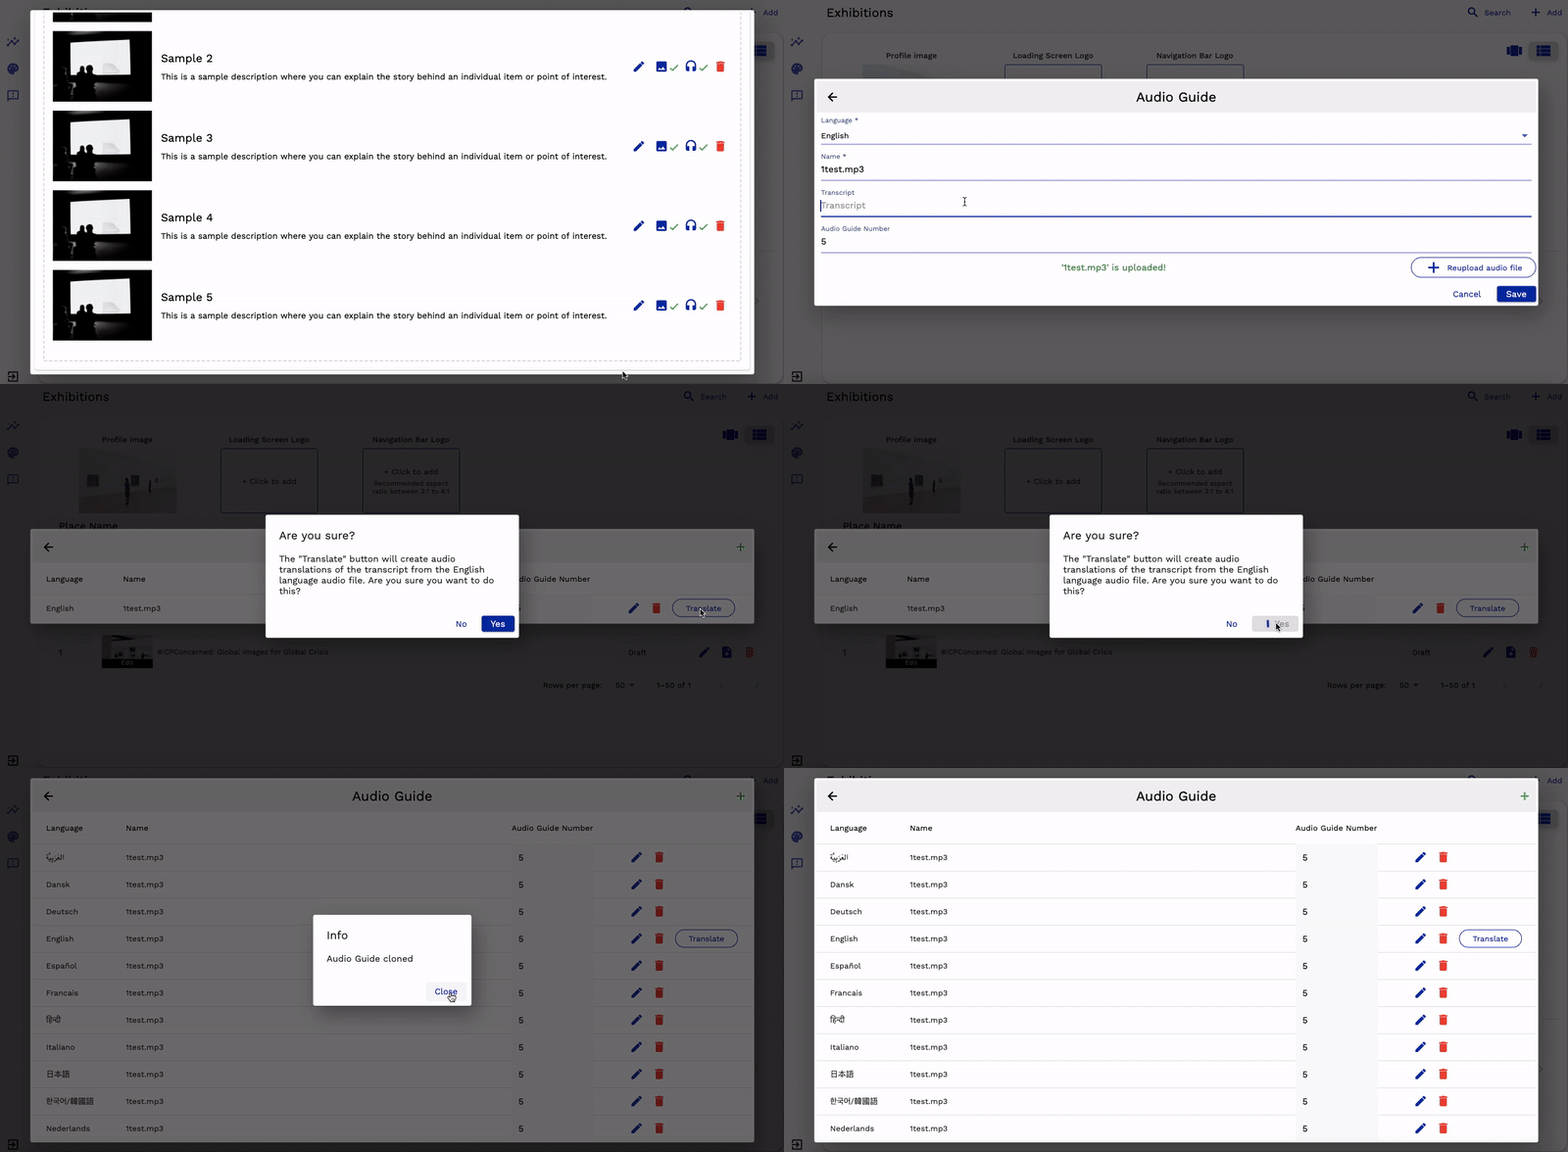
To make your audio guide more accessible for various audiences, you can translate an English transcript into 18 languages. To do this, go to your exhibition items and click on the audio guide for each item. Once you’ve uploaded a transcript and press save for each item, you’ll see a translate button next to the pencil and trash can icons. Click on this translate button to create audio translations of the transcript from the English language audio file.
Testing the official guide
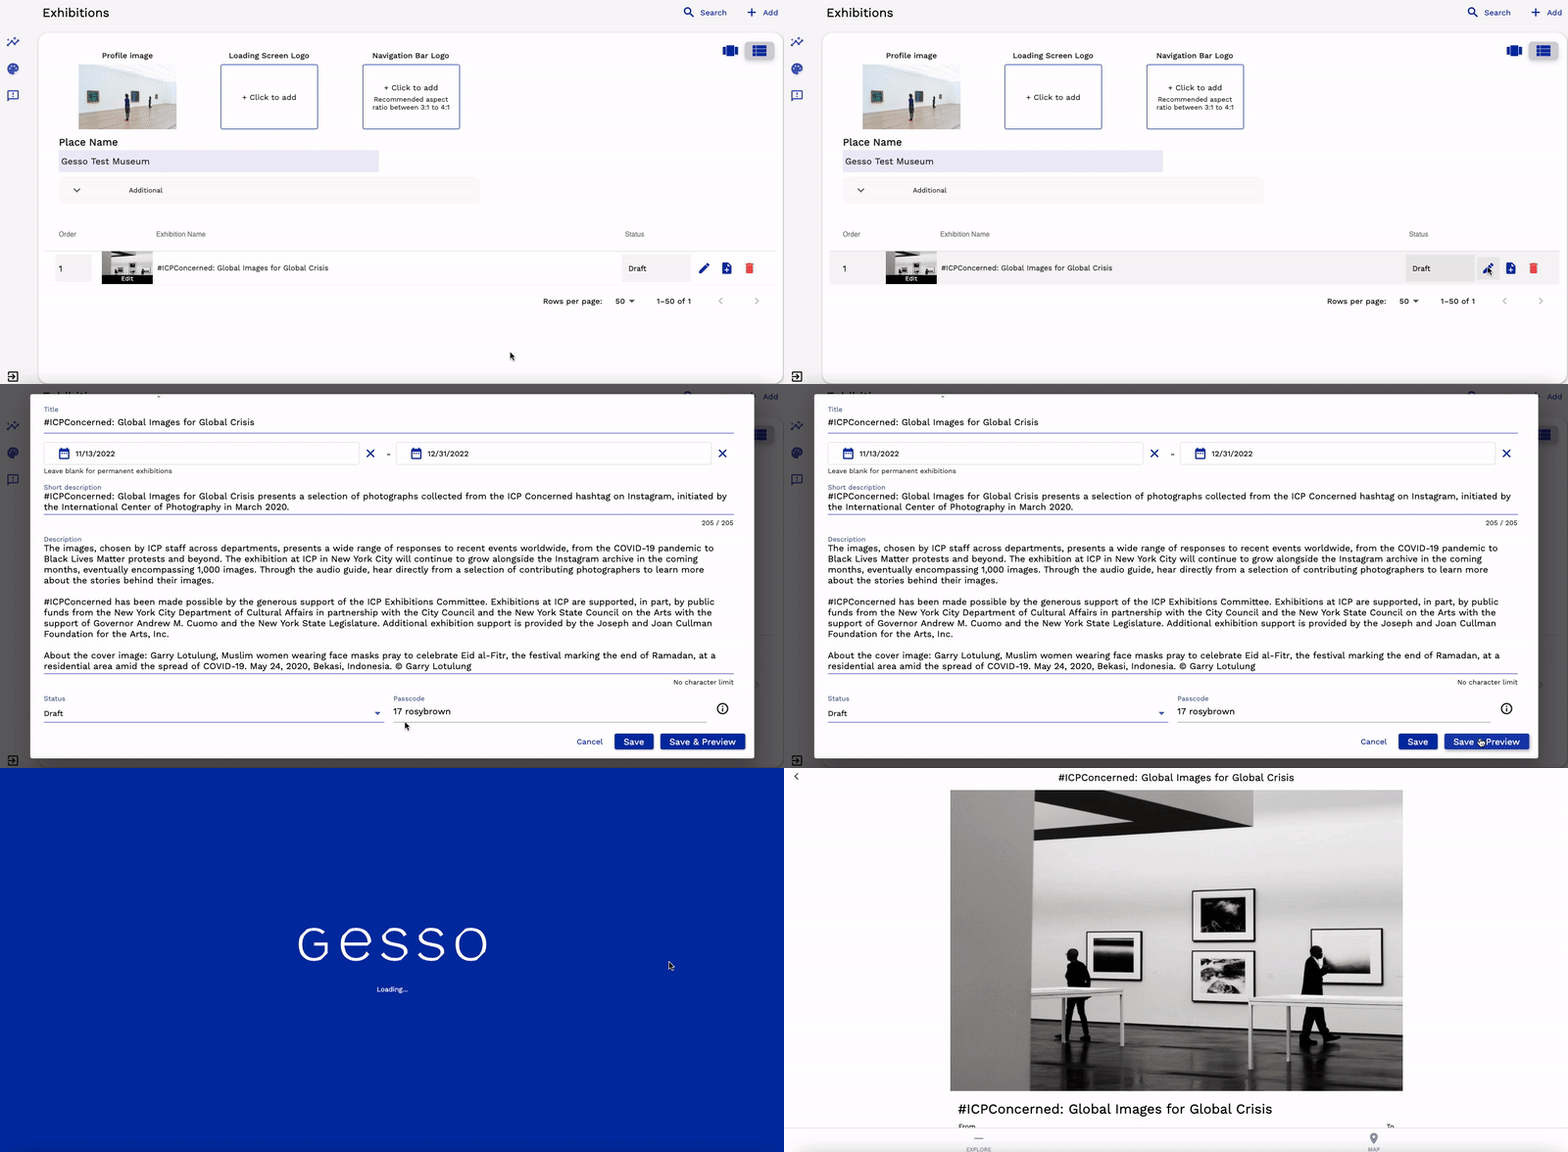
The organization's staff can test the content anytime. Whenever you want to test the official guide, head to the exhibition dashboard. Click on the “Edit exhibition details” pencil icon, and you will see an auto-generated passcode next to the status information. This passcode will allow you to test your official guide via the Gesso mobile app.
If you'd like to test the official guide via your web browser, you'll still go to the exhibition details section but this time click on the “Save & Preview” button.
Ready to publish
When you’re ready to share your official guide with the world, go to your exhibition dashboard and switch the exhibition’s status to published!
You can share your unique URL with visitors via your organization’s website, QR codes, etc. Listeners can also access your content in the Official Guides section of the Gesso mobile app.
You can hire Gesso to produce audio content for you. If interested, send us an email.
Additional help
If you’re looking for additional advice and inspiration, check out these articles that feature insights from our museum community.
If you have additional questions, check out our FAQ page.